How to setup your email on Entourage
These instructions show you how to configure your email account with ph9 / uporium / Antiques Web Design. To set up non-ph9 / uporium / Antiques Web Design email accounts, contact the company that has provided you with that email account
Please read the following BEFORE proceeding:-
- Please make sure you follow these instructions in every detail otherwise they might not work.
- There are a few slightly different versions of Entourage so screenshots in these instructions may vary slightly from what you see on your screen
- We are only an email service provider, and do not provide Entourage as it is made by Microsoft rather than us, so please note:-
- We do not provide warranty on your use of Entourage as it is not manufactured by us. These instructions are meant as a guide only
To set up your email on Entourage:-
- Select Entourage / Account Settings.
- Click the New button.
- Click the Configure account manually button.
- Click the Account type drop-down menu and select IMAP.
- Click the OK button.
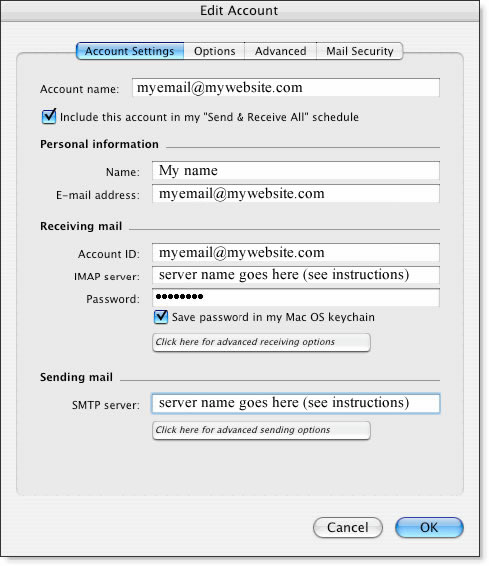
- On the Edit Account screen, perform the following steps:
- Account Name—This will appear as the name of the account in your mailbox.
- Name— This is the name that will appear in the From field of messages you send.
- E-mail address— This is the email address given to you in your welcome pack.
- Account ID— Thia will be the same as the email address field above.
- IMAP server—mail.ph9mail.co.uk
- Password—Enter the password given to you in your welcome pack.
- SMTP server - mail.ph9mail.co.uk
- Click the Click here for advanced receiving options button, located below the IMAP server box. In the pop-up screen, do the following:
- Make sure the This IMAP service requires a secure connection (SSL) box is unticked.
- Check the Override default SMTP port box, and enter the IMAP port: 143
- Leave the Always use secure password box unticked.
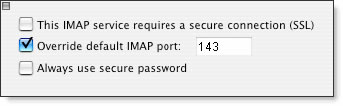
- Click the Close button, located in the upper left corner.
- SMTP Server— mail.ph9mail.co.uk
- Click the Click here for advanced sending options button, located below the SMTP server box. In the pop-up screen, do the following:
- Make sure the SMTP service requires secure connection (SSL) box is unticked.
- Check the Override default SMTP port box, and enter the SMTP port: 25
- Tick the SMTP server requires authentication box.
- Select the Use same settings as receiving mail server option.
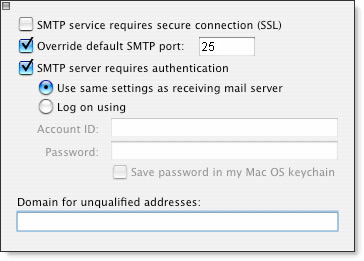
- Click the Close button, located in the upper left corner.
- Click the OK button.
- Click the Close button, located in the upper left corner.
Please note / disclaimer - We provide a email accounts as part of our service. These email accounts can be accessed directly using our web based email system at www.ph9mail.co.uk. You can also configure the software of your choice (such as the above) to access your email. However as this software isn`t made or provided by us we can not provide any warranty on it, or it working correctly. So these instructions are provided "as is" and as a guide. Should you need your computer or email software configuring properly or need computer help please contact us and we can put you in touch with our IT support company who can do this for you.