![]()
| Shortcut to this page: http://faq.ph9.com/faq_question.asp?key=1030&topic=platform-x-websites-created-since-approx-2015 |
| Platform X (websites created since approx 2015) | |
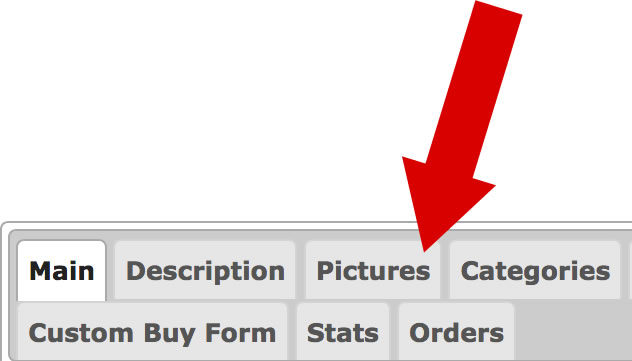
Inserting an image on products, blog entries, in the photo gallery, and on pagesThere are two ways to insert images:- 1) When adding / updating a product (item), standard page, blog entry, photo gallery entry etc, you will have an "Images" or "Pictures" tab (as pictured below).In 99% of cases, you'll simply want to use the built in tool to add an image. When adding or updating an item, blog entry, page etc, there will be a tab either called "Pictures" or "Images" where you can add images. Here you can browse an image, select it, and upload it. The advantage of using this method is that images are automatically resized and optimised for you, and put where they should be. When adding products, we solely recommend this method.
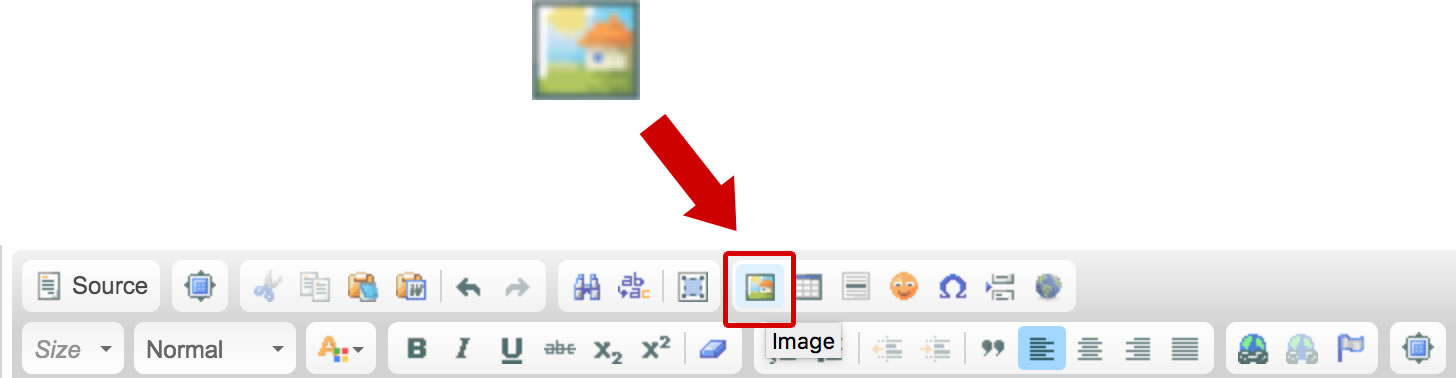
2) Adding images within the content of a pageThis method of inserting images isn't normally required, but can be incredibly useful if you want to merge images and text (eg have a bit of text, then image, then text, then image, etc), or, if you want to have an image display large on the page without having to click to enlarge it. The only downside of this method is that images aren't automatically resized for you. So, if you upload a large image (in terms of large in megabytes etc), then it will stay large after you upload it. Whereas with method 1 (above), images are automatically resized and optimised for you. In many areas of the website, we have what is called a "WYSIWYG" editor. This long winded acronym wasn't invented by us, and is industry standard for "What You See Is What You Get". On this editor, you'll see there is a tool bar at the top. On this toolbar, there is an icon to insert images. It looks like this:-
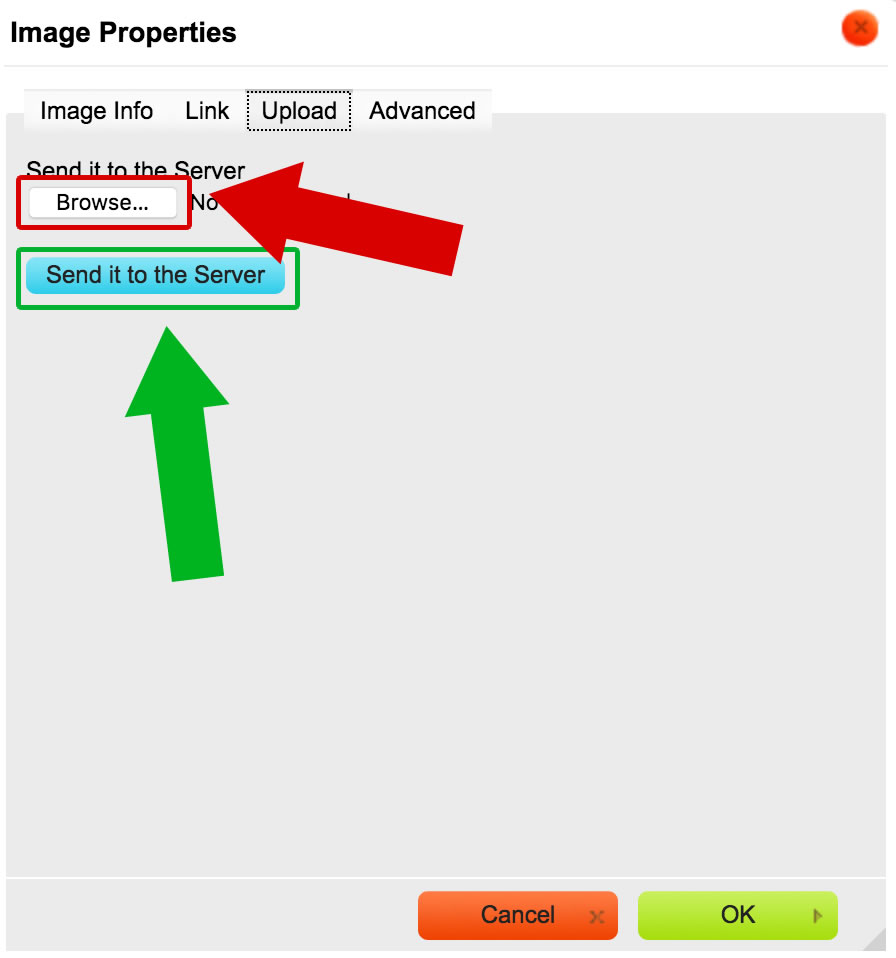
To insert an image within the text / WYSIWYG area, firstly click on the icon above. And then:- a) Click on the "Upload" tab b) Click on the "Browse" button (highlighted in red below), and then find the image on your computer Note - make sure the image you're uploading is a JPG, JPEG, PNG or GIF.... other images will mostly not work properly due to not being supported by web pages and the internet! c) After selecting an image, press "Send it to the server" (highlighted in green below)
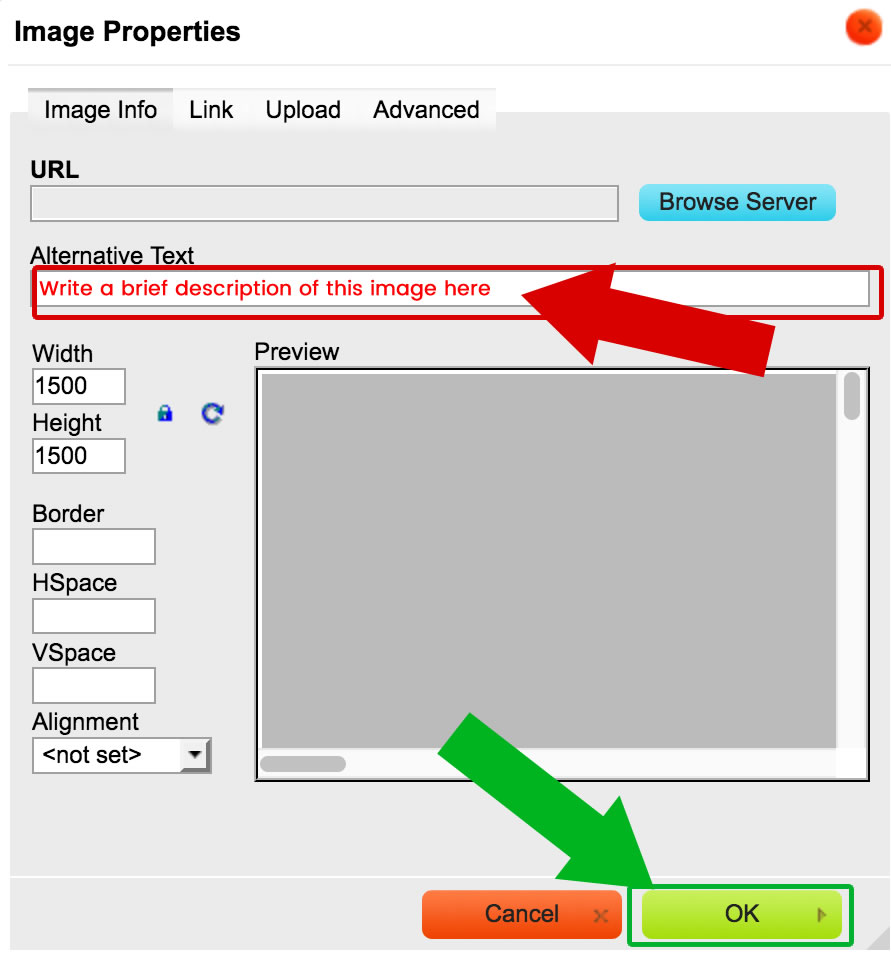
d) After sending the image to the server, you should be taken back to the "Image Info" tab, which is pictured below. If not, please wait for the image to upload, and then click on this tab e) In the "Alternative Text" box, write a brief description of the image (as pictured in red below). This may help (marginally) with SEO (search engine optimisation). This description should only be a few words, and not include any special characters such as speach marks, apostrophes, etc.
f) Once done, press the "Ok" button (as pictured in green above) to insert the image g) The image will be inserted into the content in the WYSWIG editor. You'll need to make sure you save the page (there will be a save / close button on the page) before it is fully saved h) Note that the image may appear larger in the previewer on the website manager than it does in the website manager. The website will, in most cases, adjust the image so that it does not occupy more than 100% of the width of the screen, and so that it can all be viewed at once. |
Shortcut to this page: http://faq.ph9.com/faq_question.asp?key=1030&topic=platform-x-websites-created-since-approx-2015
© 2025 ph9 Ltd. Any FAQ, guides, advice or acticles here is provided "as is" with no warranty and as per our terms and conditions at www.ph9.com/terms